Hello Everyone!
If you've read this blog in the past week you might have noticed I've been building a couple of Dragon JagdPanthers. Well I'm glad to finally be able to say they are finished!
And if you've been reading this blog since I started it (or just read some of the older posts) you have probably seen the last JagdPanther I made, that one depicted an earlier version with zimmerit. The JagdPanthers I have been building now are the late version, atleast that is the idea of the kit, but you get all the same parts as in the early version, so you are able to pretty much build whatever JagdPanther you want.
I think this kit is an older Dragon one, because as far as i know Dragon don't make kits with die-cast metal parts anymore (i could be wrong of course). In this kit the upper and lower hull are made of metal and this basicly just add weight, which isn't really a bad thing since it feels quite nice, but detail wise it isn't better than it's plastic counterpart. Beside the metal hull the kit is exactly the same as the other JagdPanther i build (except that one had zimmerit) and everything is detailed nicely, actually I think the only difference between the two sets is the phote etched grids the for engine deck, which the late version kit doesn't have sadly since it really adds some nice detail in my opinion.
The biggest problem with the metal hull is the fitting when you want to put them together, if it had been plastic you could always force it into submission, but that is quite alot harder when it's metal, a solution could be to use some putty to fill the gap (if there is one) but since i prefer to paint my model without glueing the upper and lower hull together this wasn't an option for me. So far i haven't had any realy problem with fitting though (i also build two late Panther G from Dragon which also had metal hullls) but as you can probably tell by the pictures later in this post there is a slight gap at the front of the glacis plate.
But now it's picure time!
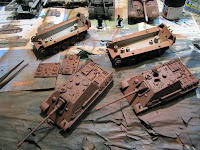
Here is a few pictures of the finished assembly process. Later i decided to change the skirts on the JagdPanther with the open commander hatch to also be battleworn.
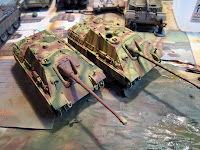
The basic painting phases completed these include priming, basecoat and the camo pattern.
The next step is a light drybush of sand followed by a black wash and another drybrush of a lighter sand tone or buff.
I also tried to give these JagdPanthers another wash this one made from a brown oil color, this one I used around every hatch, tool, welding seam etc. etc. to make everything stand out abit more. It isn't that visible on the pictures i think, but standing with the model in hand and you can see it.
I also started painting all the tools black and the dreaded wheels (which as usual is tedious work). After this I also put on the tracks and finished painting all the tools. Both models then got a coat of varnish after which i applied the decals (Some Archer Fine Transfers decals).
The finished them they got another coat of matt varnish and was left to dry.
Here are some pictures of the finished JagdPanthers! You might notice the empty commander hatch, but just need to get the time to paint some tank commanders, i got about 12 different commanders from AB figures and they are simply amazing. I need to paint a commander for my last Panther and one of my Stug III, so I'm probably going to paint all 3 together at some point.
 |
| Old JagdPanther with Zimmerit on the right |
Overall this JagdPanther kit was a pleasure to build and if I ever want to build another JagdPanther without zimmerit I would probably go for this kit again.


No comments:
Post a Comment