Hello everyone
Just thought I would start writing the next project post even though I haven't made alot of progress yet. You might have seen my Panther post and this will be another review of a Plastic Soldier Company kit, the Pz Iv.
The Box
In the box you will find a single sheet of instructions and 5 sprues which contain one tank each. Just like the panther kit the details and mold is pretty awesome on this one aswell. The only real downside of this kit is, that the tanks can't be made to have zimmerit, unless of course you have the nerve and skill to try your hand without yourself (which I don't :-p) so if you want zimmerit you would probably be better of with the official Battlefront Pz IV.
Assembly
I wanted to make my platoon into the H variant of the Pz IV, because I just always liked the look of that tank with the side skirts and everything, and sadly I haven't been able to find one in 1/72 ( I do have one in 1/35 scale and an Ausf. J, which I haven't done yet) other than the Revell kit which I just don't want to spend money on after having build some of their other kits.
The kit goes together nicely and everything just fits perfectly and you can probably make a tank in about 10 minutes time, which is quite nice.
I use a small drill to hollow out the muzzle but in the pictures I haven't done that yet as you might notice. I just feel this little thing add a lot to the overall look of the finished tank.
Painting
Just like my Panthers I will basicly be trying to paint these just like the guy does here. So far all I've done is assemble all five tanks and prepare them for priming and further painting.
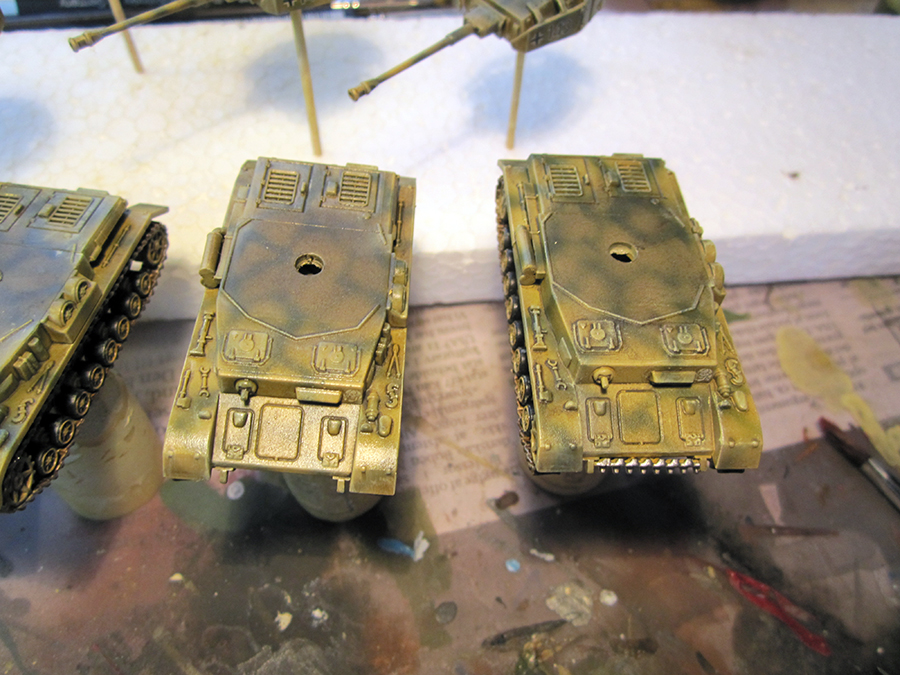
I started out by priming everything white using a Primer spray I had laying around. Afterwards I painted everything Dark Yellow using Tamiya XF-60. I decided to go with a green only camouflage pattern, which proved to be quite difficult to paint with my cheap airbrush (should really buy a good one soon...) but in the end I think I managed to achieve an acceptable result.
Then I proceeded to apply a gloss coat of varnish.
After the varnish had dried properly I applied all the decals I had chosen for my tanks and then gave them a second coat of varnish.
Painting the tracks gun metal and the wheels black almost made me want to start cutting myself...but I persevered and after a lot of small breaks I finally finished with that.
Next up I washed everything using a enamel wash for Dark Yellow vehicles by AK Interactive, I would have used some thinned down oil paint, but I need abit more practice getting it thinned properly, it always end up drying really ugly for me :/ ah well practice makes perfect.
Because the wash needed some time to dry I went to bed at this point.
After a good 8 hours sleep I had some breakfast and afterwards I started the drybrushing phase of my build. I used Abteilung 502 Luftwaffe Yellow and Snow White (but you could easily use any yellow and white oil paint for this, or a buff acrylic color or something) with these I mixed a sort of sandy light yellow color and fairly carefully drybrushed it on the raised areas of the tank.
Then using a large flat brush I went over everything trying to give the light edges a softer look.
So for the paint chips I used Tamiya Black and Flat Earth mixed about 50/50, then I took my chipping brush (Like this) and attacked the tanks. I feel I might have overdone it a tad this time around, but it was quite difficult on the turrets because of the shields taking alot of space.
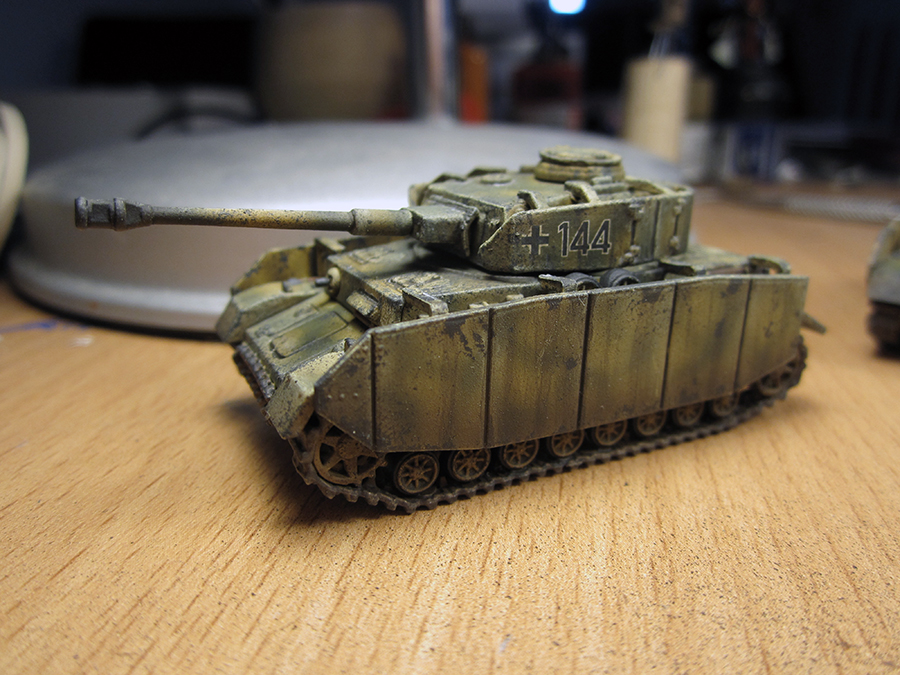
Then I made a pin wash quickly going over some of the more prominent details and making some rust/dirt streaks, mostly on the Schürzen. I decided not to make any mud one these, so I sprayed some dirt on the lower parts of Schürzen using a dark brown color heavily thinned down. While I was at it I sprayed some black on the muzzlebrakes of the guns so they look like they've been used.
Using a soft pencil I went over the track edges to make them pop abit more.
Here's a few pictures of the current state, tomorrow I will hopefully be able to finish them.
Because the chipping went a bit overboard I quickly went over the vehicles with the same color I had drybrushed them with earlier just to brighten them up slighty.
Last part of the painting process was going over all the tools and other bits that wasn't going to stay camouflaged. You might argue that they probably would have been painted on the real tanks, but since this is for a board game and the scale is quite tiny, I feel it just help the overall tank stand out more, instead of just being a yellow/green blob.
After the commanders had been painted and glued to the tanks everything recieved a matt varnish to seal everything in and give it a nice flat look.
Here's some pictures of the finished tanks, hope you like them.
Next up I will be finishing my Live Resin figure and then we'll see what I'll be painting next :-)
That's it for now!
Chris